Queues
Teams need a workspace and the ability to dispatch work based on skill level, security level, department or responsibility just to name a few. Other teams may also need to view or react to these requests as well.
OTOBO uses queues to provide your teams with structure. Queues provide a powerful way to divide and disperse the work to the responsible group of people.
Use this screen to add queues to the system. In a fresh OTOBO installation there are 4 default queues: Raw, Junk, Misc and Postmaster. All incoming messages will be stored in the Raw queue if no filter rules are defined. The Junk queue can be used to store spam messages. The queue management screen is available in the Queues module of the Ticket Settings group.
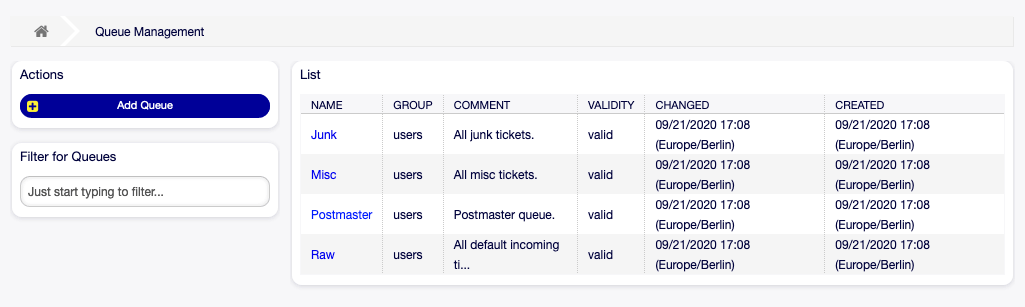
Queue Management Screen
Manage Queues
To add a queue:
- Click on the Add Queue button in the left sidebar.
- Fill in the required fields.
- Click on the Save button.
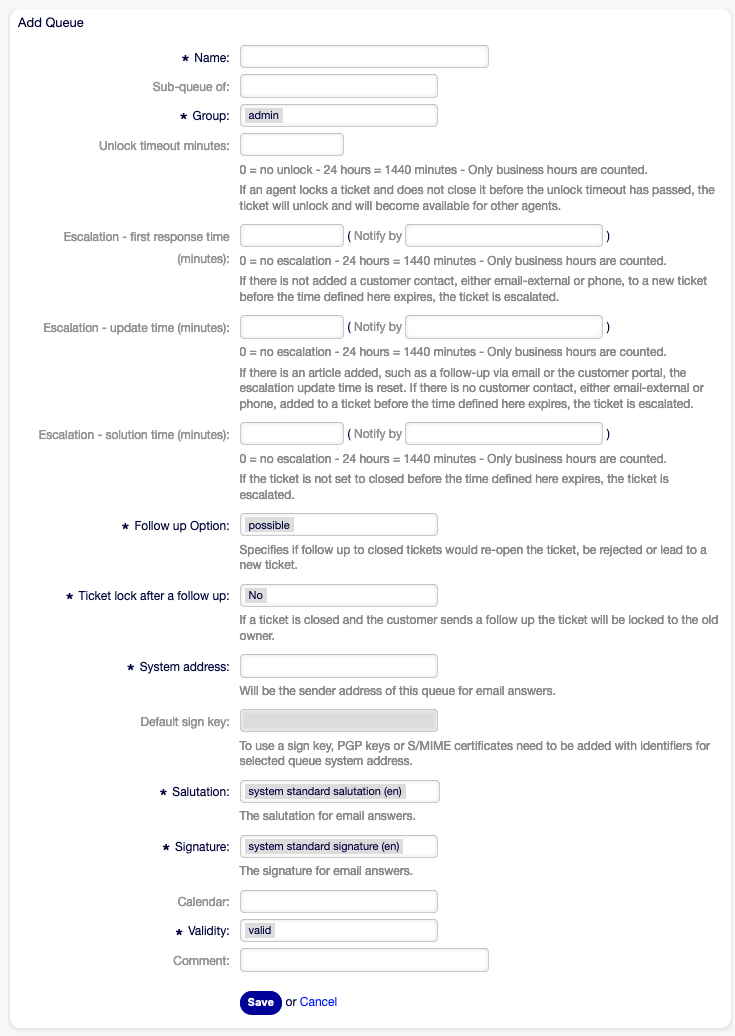
Add Queue Screen
Warning
Queues can not be deleted from the system. They can only be deactivated by setting the Validity option to invalid or invalid-temporarily.
To edit a queue:
- Click on a queue in the list of queues.
- Modify the fields.
- Click on the Save or Save and finish button.
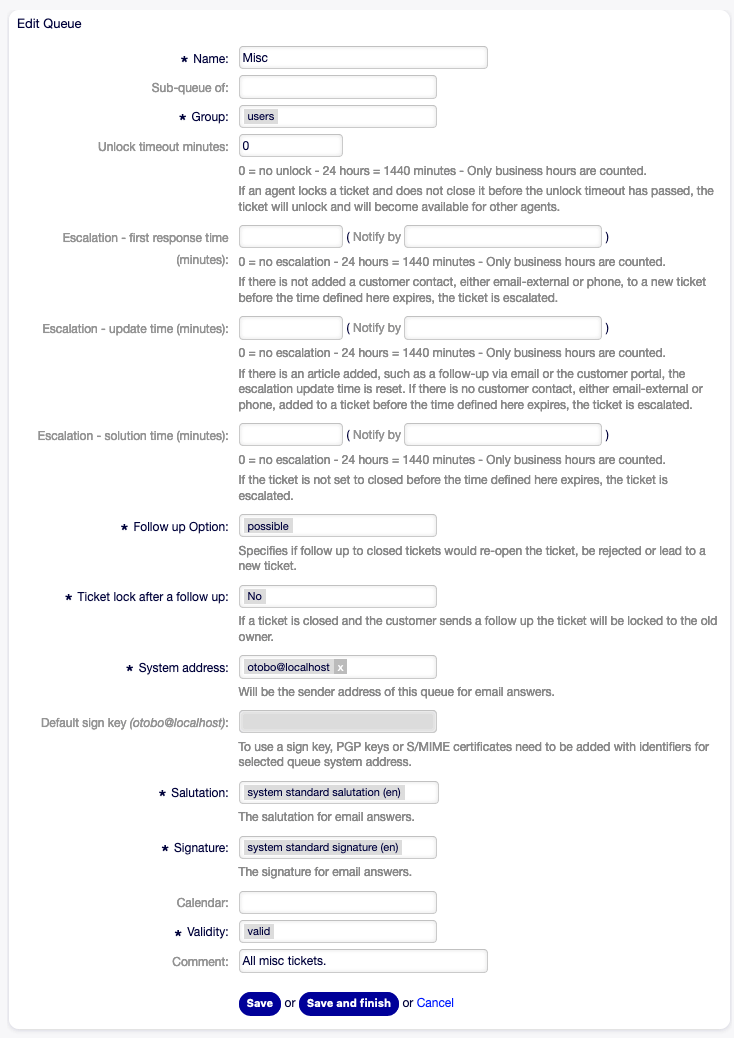
Edit Queue Screen
Note
If several queues are added to the system, use the filter box to find a particular queue by just typing the name to filter.
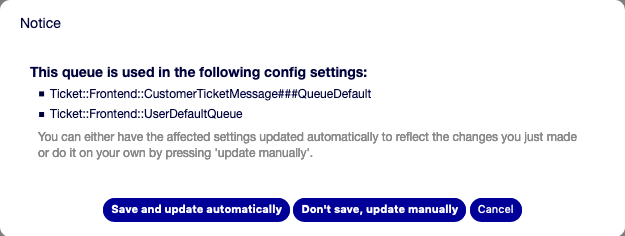
Queue Validation Dialog
If you change the name of a queue which is used in the system configuration, a validation check will warn you and give you the following options:
- Save and update automatically
- Apply the change and also update the affected settings.
- Don’t save, update manually
- Apply the change, but don’t update the affected settings. The updates need to be done manually.
- Cancel
- Cancel the action.
Warning
Changing the name of this object should be done with care, the check only provides verification for certain settings and ignores things where the name can’t be verified. Some examples are dashboard filters, action control lists (ACLs), and processes (sequence flow actions) to name a few. Documentation of your setup is key to surviving a name change.
Queue Settings
The following settings are available when adding or editing this resource. The fields marked with an asterisk are mandatory.
- Name *
- The name of this resource. Any type of characters can be entered to this field including uppercase letters and spaces. The name will be displayed in the overview table.
- Sub-queue of
- It is possible to add the new queue under an existing one as sub-queue. This will be displayed as Parent Queue::Child Queue.
- Group *
- It is possible to limit access to the selected group. The group creates a permission link between the queue and an agent or a customer user.
- Unlock timeout minutes
- Any ticket on open, which is locked, in this queue will automatically unlock after the set amount of minutes. The value 0 (default) means tickets in this queue remain locked.
- Escalation - first response time (minutes)
The maximum amount of working time allowed before the agent contacts with the customer.
Note
First response time will not trigger for an email ticket or telephone ticket created by an agent.
- Notify by
- Notify before time limit is reached (in percent).
- Escalation - update time (minutes)
- The maximum amount of working time allowed between the agent contacts with the customer.
- Notify by
- Notify before time limit is reached (in percent).
- Escalation - solution time (minutes)
The maximum amount of working time allowed until the ticket is marked as solved.
Note
Solution time will not reset if the ticket is reopened.
- Notify by
- Notify before time limit is reached (in percent).
- Follow up Option *
Specify the handling of a follow up on closed tickets. Possible values:
- new ticket
- The follow up will create a new ticket.
- possible
- The follow up will reopen the already closed ticket.
- reject
- The follow up will be rejected.
See also
See Auto Responses chapter for more information.
- Ticket lock after a follow up *
Only applicable if the Follow up Option is set to possible. Locks the previously closed ticket, upon reopening, to the last owner. This ensures that a follow up for a ticket is processed by the agent that has previously handled that ticket.
Warning
This does not take out-of-office into account. Use this setting with care to ensure or in combination with Unlock timeout minutes.
- System address *
Select one of the Email Addresses as the sender identity for this queue.
Note
This is an ID in the database. Making changes to the Email Addresses can have adverse effects here.
- Default sign key
- This is only active if PGP Keys or S/MIME Certificates is enabled in the System Configuration. Choose the key to sign emails per default.
- Salutation *
- Select one of the defined Salutations.
- Signature *
- Select one of the defined Signatures.
- Calendar
- Select the calendar which defines working hours for this queue. Calendars are defined in the System Configuration.
- Validity *
- Set the validity of this resource. Each resource can be used in OTOBO only, if this field is set to valid. Setting this field to invalid or invalid-temporarily will disable the use of the resource.
- Comment
- Add additional information to this resource. It is recommended to always fill this field as a description of the resource with a full sentence for better clarity, because the comment will be also displayed in the overview table.
- Chat Channel
- Chat channel that will be used for communication related to the tickets in this queue.