Customer Service Catalogue
Note
Rother OSS TODO: This feature will be included in one of the next OTOBO releases. If you need it beforehand, please contact sales@otobo.de, we will find a solution.
Use this screen to add categories and items for use in external interface. A fresh OTOBO installation doesn’t contain any categories or items by default. The catalogue management screen is available in the Customer Service Catalogue module of the External Interface group.
This module consists of two management screens: a category management screen and an item management screen.

Customer Service Catalogue Management Screen
Manage Categories
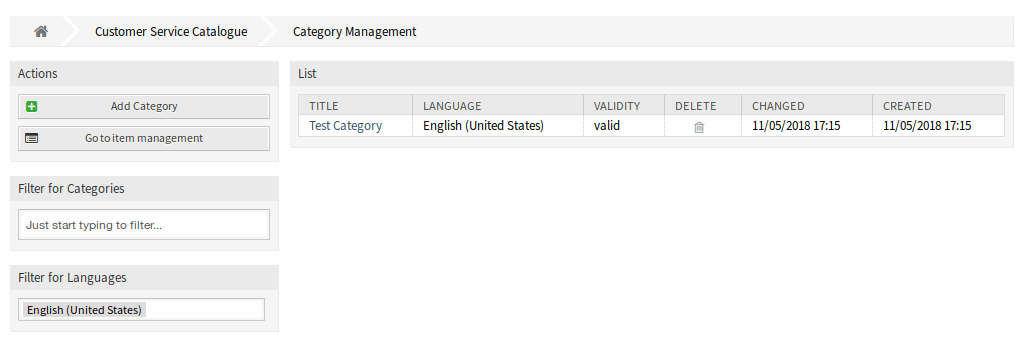
Use this screen to add categories to collect the same items into groups. The Category Management screen in available via the Go to category management button or via the Category Management module.

Category Management Screen
To add a category:
- Click on the Add Category button in the left sidebar.
- Fill in the required fields.
- Click on the Save button.

Add Category Screen
To edit a category:
- Click on a category in the list of categories.
- Modify the fields.
- Click on the Save or Save and finish button.

Edit Category Screen
To delete a category:
- Click on the trash icon in the Delete column of the overview table.
- Click on the Confirm button.

Delete Category Screen
Note
If several categories are added to the system, use the filter box to find a particular category by just typing the name to filter.
Category Settings
The following settings are available when adding or editing this resource. The fields marked with an asterisk are mandatory.
- Title *
- The name of this resource. Any type of characters can be entered to this field including uppercase letters and spaces. The name will be displayed in the overview table.
- Sub-category of
- It is possible to add the new category under an existing one as sub-category. This will be displayed as Parent Category::Child Category.
- Language *
- Select a language from the available languages of the system.
- Validity *
- Set the validity of this resource. Each resource can be used in OTOBO only, if this field is set to valid. Setting this field to invalid or invalid-temporarily will disable the use of the resource.
Manage Items
Use this screen to add items to the catalogue. Items can be collected into categories. The Item Management screen in available via the Go to item management button or via the Item Management module.

Item Management Screen
To add an item:
- Click on the Add Item button in the left sidebar.
- Fill in the required fields.
- Click on the Save button.

Add Item Screen
To edit an item:
- Click on an item in the list of items.
- Modify the fields.
- Click on the Save or Save and finish button.

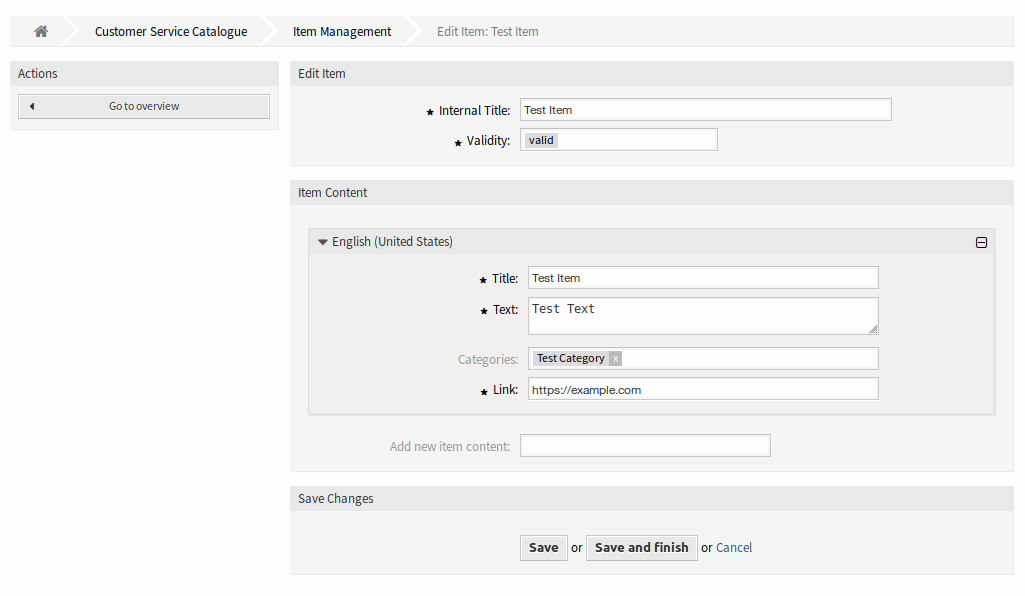
Edit Item Screen
To delete an item:
- Click on the trash icon in the Delete column of the overview table.
- Click on the Confirm button.

Delete Item Screen
Note
If several items are added to the system, use the filter box to find a particular item by just typing the name to filter.
Item Settings
The following settings are available when adding or editing this resource. The fields marked with an asterisk are mandatory.
- Internal Title *
- The name of this resource, that is only displayed in the admin interface. Any type of characters can be entered to this field including uppercase letters and spaces. The name will be displayed in the overview table.
- Validity *
- Set the validity of this resource. Each resource can be used in OTOBO only, if this field is set to valid. Setting this field to invalid or invalid-temporarily will disable the use of the resource.
- Item Content
In this widget can be added some localized content for the item.
- Title *
- The name of this resource in the given language. Any type of characters can be entered to this field including uppercase letters and spaces.
- Text *
- The text for this item in the given language.
- Categories
One ore more categories can be selected for the item in which the item should be visible.
Note
Only those categories can be selected, that have the same language as the selected language for this widget.
- Link *
- A link to an internal or an external URL.
- Add new item content
- Select which languages should be added to create localized item content. All added languages can hold its own localized content, that are explained above.