Layout
Note
Rother OSS TODO: This feature will be included in one of the next OTOBO releases. If you need it beforehand, please contact sales@otobo.de, we will find a solution.
Use this screen to edit the layout displayed in external interface. The layout management screen is available in the Layout module of the External Interface group.
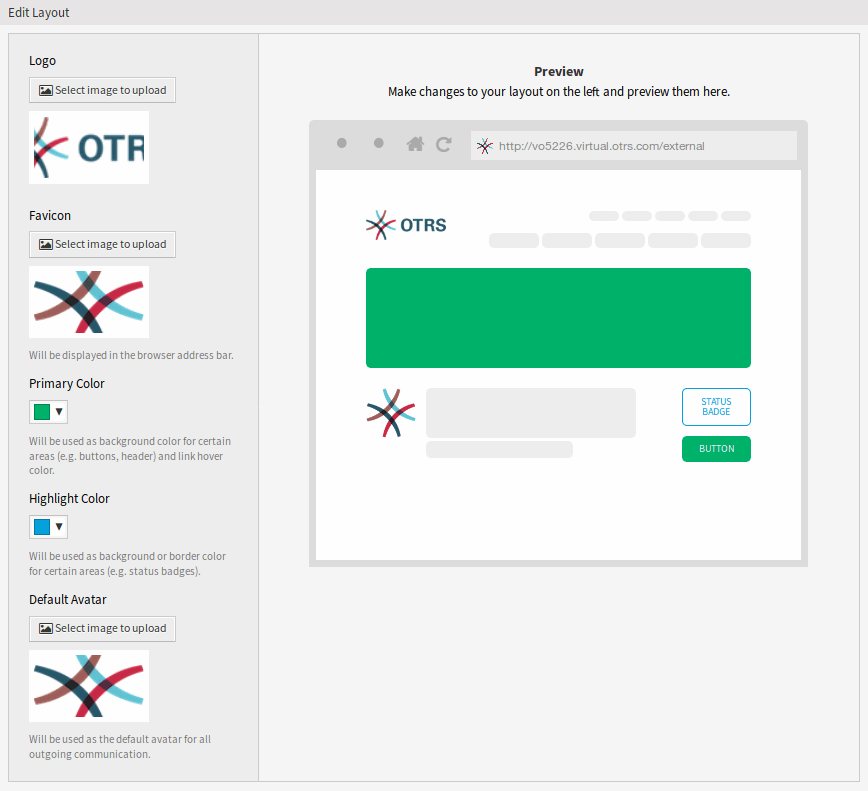
Edit Layout Screen
A fresh OTOBO installation already contains a default layout. In this screen all parameters can be changed.
Warning
Make sure to save your changes when you finish. The new configuration will be immediately deployed.
- Logo
The logo is a small image that is displayed in the top left corner of the external pages.
To change the logo, click on the Select image to upload button, and select a new logo image. Recommended file format is PNG.
- Favicon
The favorite icon is an icon that is displayed in the URL bar of the web browser.
To change the favorite icon, click on the Select image to upload button, and select a new icon. This is usually a 16×16 pixel image in PNG or ICO format.
- Primary Color
Primary color is the most important color of the external pages (see the preview screen).
To change the primary color, just select a new color from the color palette. You can chose from the pre-selected colors or define other colors by choosing it from the color selector or typing the hexadecimal value. The new color will be displayed in the preview widget immediately.
- Highlight Color
Highlight color is the second color of the external pages using for status badges, links, etc.
To change the highlight color, just select a new color from the color palette. You can chose from the pre-selected colors or define other colors by choosing it from the color selector or typing the hexadecimal value. The new color will be displayed in the preview widget immediately.
- Default Avatar
Will be used as the default avatar for all outgoing communication.
To change the avatar, click on the Select image to upload button, and select a new avatar image.
- Custom CSS
Use this text area to add custom CSS to be applied in the external interface.
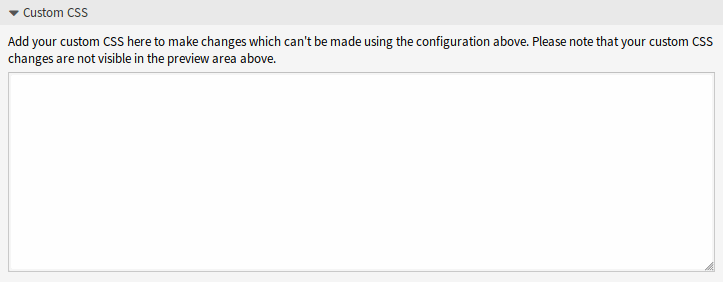
Custom CSS Widget
Include Custom Scripts
External interface application has been built with security-first mindset in place. It contains several mechanisms to make sure that all code in the front end is provided directly by the OTOBO framework.
In addition, a security standard called Content Security Policy headers is now leveraged by the built-in web server. It serves as a last line of defense and in case some unexpected code still makes it to the client, it will make sure that the user’s browser simply refuses to run it.
However, a use-case still exists in which even a modern web application might still need to run some additional code, provided it is vetted and included by the administrators. One example could be an external integrated chat solution, but could also be an inline code snippet used for external web analytics.
See also
Including custom scripts can be done in the System Configuration with the following settings:
ExternalFrontend::ExternalScriptsExternalFrontend::InlineScriptsWebApp::Server::AdditionalOrigins
Web Analytics Example
In this example, we outline the steps to include custom scripts used by a web analytics provider in the external interface application. They will be run each time the application is used in order to track and report the behavior of the user for later analysis.
We start with the provided code snippet below, from a third party provider.
<script async src="https://www.example.com/track/js?id=UA-XXXXXX-Y"></script>
<script>
   window.dataLayer = window.dataLayer || [];
   function track(){dataLayer.push(arguments);}
   track('js', new Date());

   track('config', 'UA-XXXXXX-Y');
</script>
First line of the snippet refers to an external resource which should be loaded by the script tag.
In the script block below, we have some inline code which is run immediately when the page is loaded.
Adding External Script Resources
First, we need to include the external script location in the appropriate configuration:
Go to the System Configuration screen.
Search for the setting
ExternalFrontend::ExternalScripts.Click on the setting in order to edit it.
In case a value is already present, click on the plus button. Otherwise, proceed below.
Enter the full location of the external resource in the text field. For example:
https://www.example.com/track/js?id=UA-XXXXXX-Y.Click on the check mark in order to save the modified setting.
Deploy the modified system configuration.
Adding Inline Code Snippets
Next, we have to also include the inline part of the original snippet:
Go to the System Configuration screen.
Search for the setting
ExternalFrontend::InlineScripts.Click on the setting in order to edit it.
In case a value is already present, click on the plus button. Otherwise, proceed below.
Enter the full code snippet in the text area, minus any
scripttags. For example:window.dataLayer = window.dataLayer || []; function track(){dataLayer.push(arguments);} track('js', new Date()); track('config', 'UA-XXXXXX-Y');
Click on the check mark in order to save the modified setting.
Deploy the modified system configuration.
Rebuilding the External Interface Application
In order to apply the changes, we also need to rebuild the external interface application. Drop down to shell, and execute the following command:
bin/otobo.WebServer.pl --deploy-assets
Whitelisting Additional Origins in the Security Headers
If you now try to access the external interface application, you will be able to verify that the scripts are included in the code. However, your browser will probably block access to all inline and external resources, therefore the code might fail with some errors.
This behavior is by design, since external resources can only be loaded if they are specifically whitelisted in the Content Security Policy headers.
To check for blocked code, please use suitable web browser inspection tools. In our example, we will be using Mozilla Firefox and its web console available via Tools → Web Developer → Web Console menu item, or via the F12 shortcut key.
For the example code snippet, you might receive following errors in the console when the application is accessed:
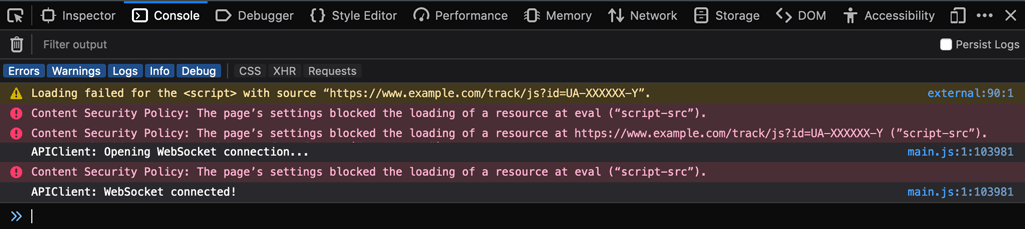
Browser Console Errors and Warnings
From the console errors we can see that the external script resource was prevented from being loaded (lines 1 and 3). In addition to that, two evaluation calls were also blocked (lines 2 and 5). All errors reference a Content Security Policy rule under the name of script-src, which signals script resources.
We need to add both the external resource and the evaluation calls to the additional origins list of the Content Security Policy headers:
Go to the System Configuration screen.
Search for the setting
WebApp::Server::AdditionalOrigins.Click on the setting in order to edit it.
In case a value for
script-srcis already present, click on the plus button next to it. Otherwise, proceed below.Enter the domain part only of the blocked resource in the text field. For example:
https://www.example.com. This allows the external resource to be loaded.Click on the plus button next to the field, so another value is added.
Enter the following directive in the new field, including the quotes:
'unsafe-eval'. This allows the evaluation calls to be executed.Click on the check mark in order to save the modified setting.
Deploy the modified system configuration.
There is no need to rebuild the external interface application at this point, as the additional origins configuration should be immediately in effect.
If you reload the external interface application, you might get some additional errors. In our example, it might be the following:

Additional Browser Console Errors and Warnings
This error points that an additional resource that was also blocked, an image at a specific location (line 1). We can deduce this via the name of the Content Security Policy rule img-src, which references an image resource. In order to add it to the whitelist, try the following:
Go to the System Configuration screen.
Search for the setting
WebApp::Server::AdditionalOrigins.Click on the setting in order to edit it.
In case a value for
img-srcis already present, click on the plus button next to it. Otherwise, proceed below.Enter the domain part only of the blocked resource in the text field. For example:
https://www.example.com. This allows the external image resource to be loaded.Click on the check mark in order to save the modified setting.
Deploy the modified system configuration.
Try again to reload the external interface application and check if there are more errors. If not, your scripts are now probably working as expected.
Unfortunately, it is not possible to predict what kind of resources your scripts might be requiring. But, no worries, you can whitelist most of them, just make sure to follow the trail of hints shown in the browser console log. Find a corresponding header rule in the configuration and update it accordingly.
Note
Some resources might only be requested by others, hence several iterations might be needed until everything is configured properly.
Warning
Whitelisting external resources opens potential security risks in your OTOBO application! Only allow those resources that you are sure are not malicious and come from reputable sources. Keep in mind that if something is secure today, does not mean it will be tomorrow. Stay safe!