Chat Channels
Note
Rother OSS TODO: This feature will be included in one of the next OTOBO releases. If you need it beforehand, please contact sales@otobo.de, we will find a solution.
Being able to offer chat possibilities to customers is a must-have for many organizations. Depending on the amount of customer chat requests and the organization’s structure, it must be possible to group chat requests.
OTOBO offers chat channels with different permissions per channel, so it is, e.g. possible to have different chat channels for registered contract customers and public prospects.
Use this screen to add chat channels to the system. A fresh OTOBO installation contains no chat channels by default. The chat channel management screen is available in the Chat Channels module of the Administration group.

Chat Channel Management Screen
Manage Chat Channels
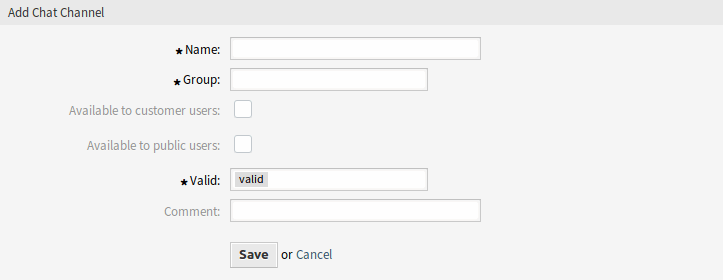
To add a chat channel:
- Click on the Add Chat Channel button in the left sidebar.
- Fill in the required fields.
- Click on the Save button.

Add Chat Channel Screen
Warning
Chat channels can not be deleted from the system. They can only be deactivated by setting the Validity option to invalid or invalid-temporarily.
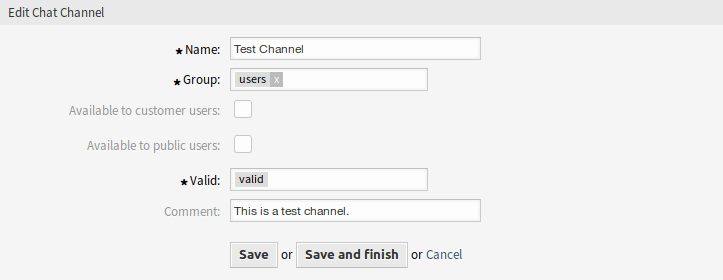
To edit a chat channel:
- Click on a chat channel in the list of chat channels.
- Modify the fields.
- Click on the Save or Save and finish button.

Edit Chat Channel Screen
Chat Channel Settings
The following settings are available when adding or editing this resource. The fields marked with an asterisk are mandatory.
- Name *
- The name of this resource. Any type of characters can be entered to this field including uppercase letters and spaces. The name will be displayed in the overview table.
- Group *
- Select which Groups can access the chat channel.
- Available to customer users
- Select the checkbox if you want to display the chat channel for customer users.
- Available to public users
- Select the checkbox if you want to display the chat channel for public users.
- Valid *
- Set the validity of this resource. Each resource can be used in OTOBO only, if this field is set to valid. Setting this field to invalid or invalid-temporarily will disable the use of the resource.
- Comment
- Add additional information to this resource. It is recommended to always fill this field as a description of the resource with a full sentence for better clarity, because the comment will be also displayed in the overview table.
Enable Chat Support
Note
The chat feature is not enabled by default.
To enable the chat feature:
- Go to System Configuration screen.
- Navigate to Core → Chat in the navigation tree.
- Enable the setting
ChatEngine::Active.
When the chat feature is enabled, the Default channel is automatically created if it does not exist.
To review all chat related settings:
- Go to System Configuration screen.
- Search for the term
ChatEnginein the search box. - Review the settings.
See also
Agents need to have at least ro permissions to the groups set up in the following settings:
ChatEngine::PermissionGroup::ChatReceivingAgentsChatEngine::PermissionGroup::ChatStartingAgents