Package Manager
Modular systems can be extended by adding additional software packages to the framework. Administrators need an easy way to see which features are installed in which version and for sure to add, update and remove packages.
OTOBO uses a package manager to perform all package-related activities as mentioned above in the graphical interface.
Use this screen to install and manage packages that extend the functionality of OTOBO. The package manager screen is available in the Package Manager module of the Administration group.
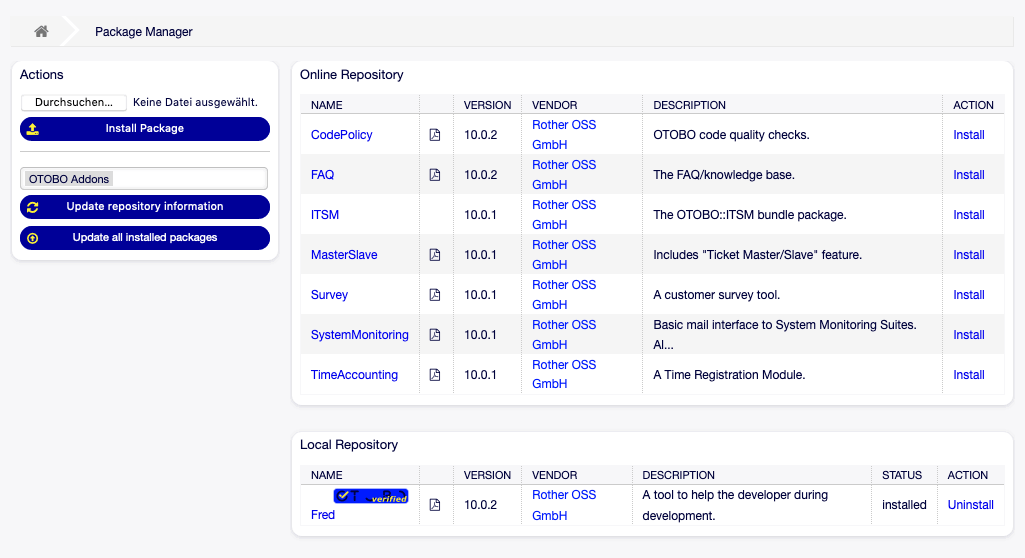
Package Manager Screen
Manage Packages
Warning
The installation of packages which are not verified by Rother OSS is possible by default, cause we love open source.
See also
You can deactivate the installation of not verified packages in the system configuration setting Package::AllowNotVerifiedPackages.
Install Packages
To install a package from online repository:
Select an online repository from the drop-down in the left sidebar.
Click on the Update repository information button to refresh the available package list.
Select a package from the Online Repository widget and click on the Install in the last column.
Follow the installation instructions.
After installation, the package is displayed in the Local Repository widget.
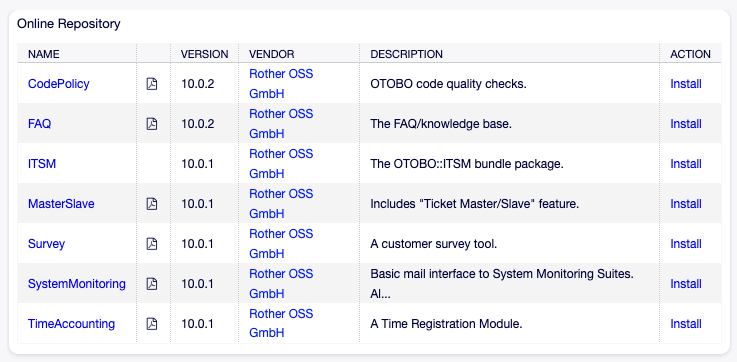
Online Repository Widget
See also
The repository list can be changed in system configuration setting Package::RepositoryList.
To install a package from file:
Click on the Browse… button in the left sidebar.
Select an
.opmfile from your local file system.Click on the Install Package button.
Follow the installation instructions.
After installation, the package is displayed in the Local Repository widget.

Local Repository Widget
Update Packages
To update a package from online repository:
Check the available packages in the Online Repository widget if there is Update in the Action column.
Click on the Update link.
Follow the update instructions.
After updating, the package is displayed in the Local Repository widget.
To update a package from file:
Click on the Browse… button in the left sidebar.
Select an
.opmfile which is newer than the installed package.Click on the Install Package button.
Follow the update instructions.
After updating, the package is displayed in the Local Repository widget.
To update all packages:
Click on the Update all installed packages button in the left sidebar.
Follow the update instructions.
After updating, the package is displayed in the Local Repository widget.
This feature reads the information of all defined package repositories and determines if there is a new version for every installed package in the system and calculates the correct order to update the packages respecting all other package dependencies, even if new versions of existing packages require new packages not yet installed in the system.
Note
If there are packages installed that do not have a corresponding repository defined in the system, they can not be updated by this feature and will be marked as failed (due to the missing on-line repository).
Reinstall Packages
If at least one of the package files are modified locally, the package manager marks the package as broken, and need to reinstall.
To reinstall a package:
Select the package from the Local Repository widget that are marked for reinstall.
Click on the Reinstall link in the Action column.
Follow the installation instructions.
Uninstall Packages
To uninstall a package:
Select the package from the Local Repository widget.
Click on the Uninstall link in the Action column.
Follow the uninstall instructions.
Local Repository Widget