OIDC based OAuth2 Authentication for Email
Regardless whether OAuth2 is used for sending or fetching email, a valid OAuth2 FunctionalAccount and its corresponding OIDC provider settings need to be configured in the Admin UI. These can be set up using the ‘OAuth Functional Accounts’ and ‘OIDC Profile Management’ modules in the Admin UI, respectively.
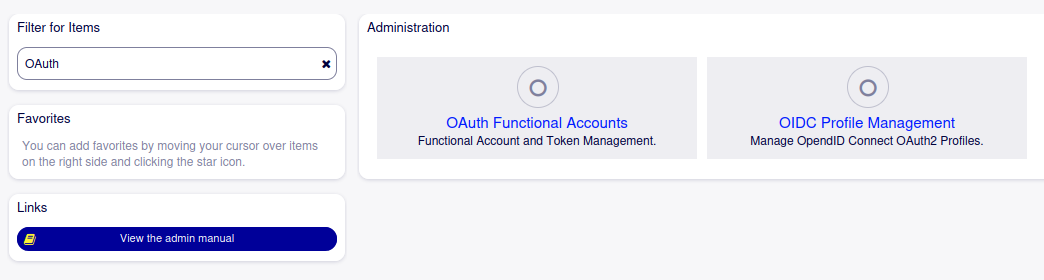
For more information on setting up OIDC Profiles and Functional Accounts for OAuth2, please refer to the section OIDC-based OAuth2 authentication.
Note
On the OIDC Provider the Functional Account user must have the proper permissions assigned, as these will be specific to mail server and OIDC Provider used please refer to your email provider’s instructions on how to setup authentication via OIDC.
Note
The Functional Account configured in OTOBO will possibly need to have the proper OAuth2 scopes and/or resource ids configured specific to the mail server and OIDC Provider used. Again please refer to your email provider’s documentation to determine the necessary settings.
SMTP
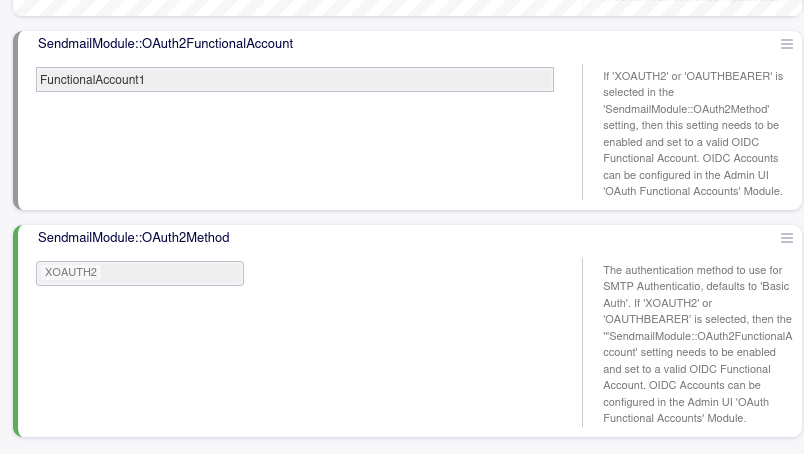
For outgoing email sending via SMTP, OAuth2 authentication has to be enabled in System Configuration under Core > Email:
The
SendmailModulesetting must be one of the SMTP options. ChoosingSMTPSorSMTPTLSis strongly recommended from a security perspective. Do not use unencrypted SMTP with OAuth2 tokens in a production environmentMake sure you use the proper
SendmailModule::Portfor the chosen SMTP methodThe
SendmailModule::OAuth2Methodsetting must be set to eitherXOAUTH2orOAUTHBEARERThe
SendmailModule::OAuth2FunctionalAccountsetting must be set to the name of an OAuth Functional Account configured in the Admin UI as outlined aboveThe
SendmailModule::AuthUsermust be set to the username of the Functional Account that is used to send emailThe
SendmailModule::AuthPasswordwill not be used withXOAUTH2and/orOAUTHBEARER
POP3/IMAP
For incoming email fetched via POP3 or IMAP, settings can be provided via the Admin UI Postmaster Mailaccounts module.
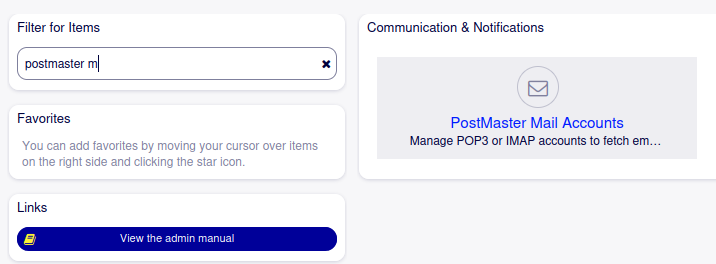
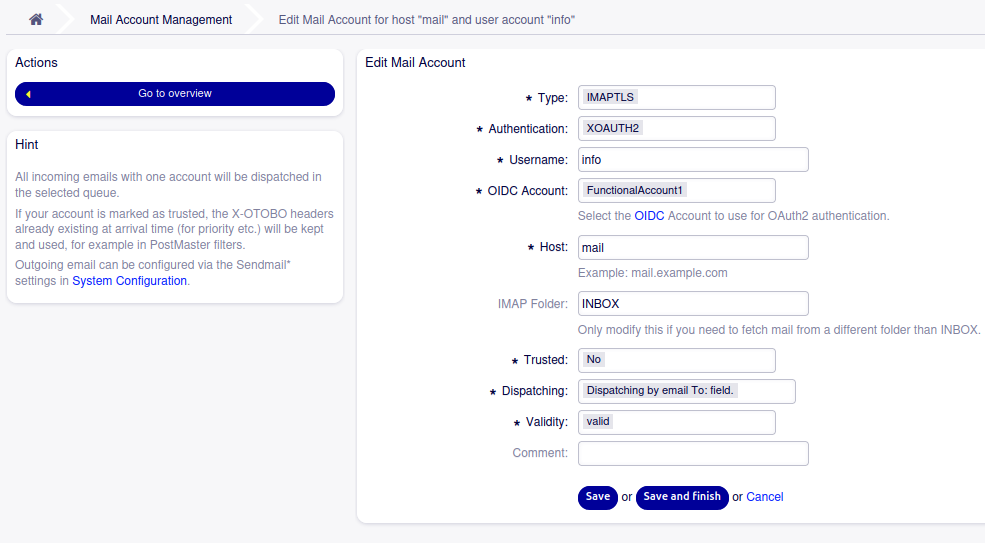
To enable XOAUTH2 or OAUTHBEARER for a given Postmaster mail account, do:
Change the authentication option from the default
Basic Authoption to eitherXOAUTH2orOAUTHBEARERdepending on your needsSelect the Functional Account to be used for fetching email that you have configured above from the drop down list
Specify the username of the Functional Account that is used to fetch email
Note
Do not use unencrypted POP3 or IMAP protocols with OAuth tokens in a production environment. Always prefer to use the encrypted TLS or STARTTLS protocols for POP3 (POP3S or POP3TLS) or for IMAP (IMAPS or IMAPTLS).
Configuration Reference
Core::Email
SendmailModule::OAuth2FunctionalAccount
If XOAUTH2 or OAUTHBEARER is selected in the SendmailModule::OAuth2Method setting, then this setting needs to be enabled and set to a valid OIDC Functional Account.
OIDC Accounts can be configured in the Admin UI OAuth Functional Accounts Module.
SendmailModule::OAuth2Method
The authentication method to use for SMTP Authentication, defaults to Basic Auth.
If XOAUTH2 or OAUTHBEARER is selected, then the SendmailModule::OAuth2FunctionalAccount setting needs to be enabled and set to a valid OIDC Functional Account.
OIDC Accounts can be configured in the Admin UI OAuth Functional Accounts Module.
Azure Configuration
Note
This description in based on our experience with Microsoft Azure as OIDC provider for OAuth2 authentication with our customers. In no way does Rother OSS endorse the use of Microsoft Azure. It may guide and inform your own configuration. However, for more detailed information always consult the official Microsoft Azure documentation.
Go to https://portal.azure.com
Switch to Azure Active Directory and add a new Enterprise Application:
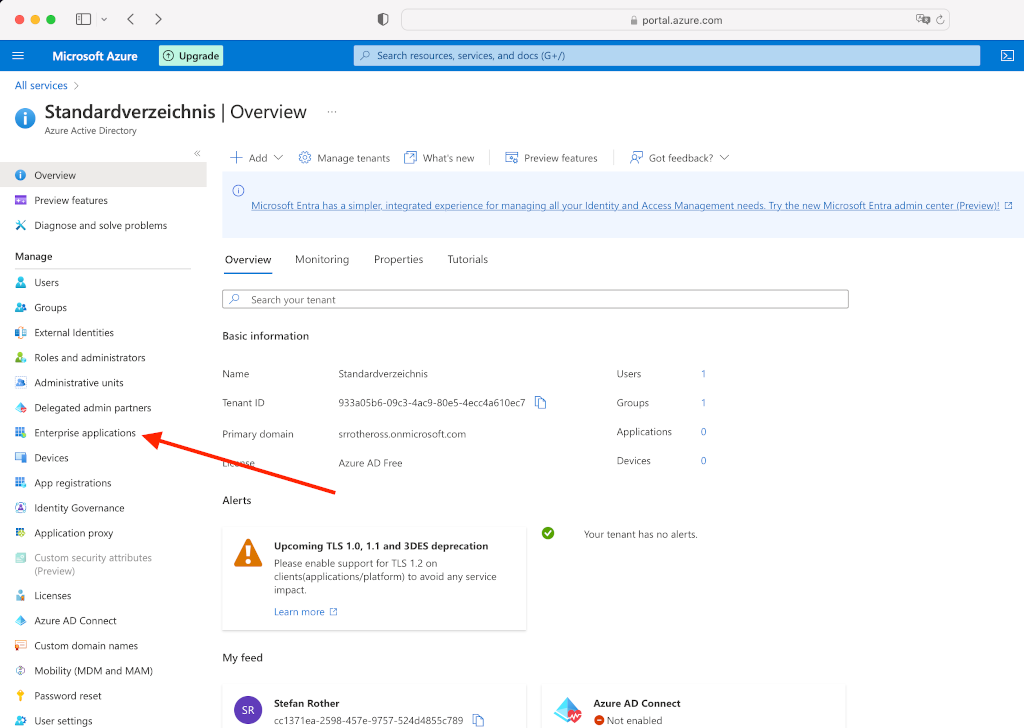
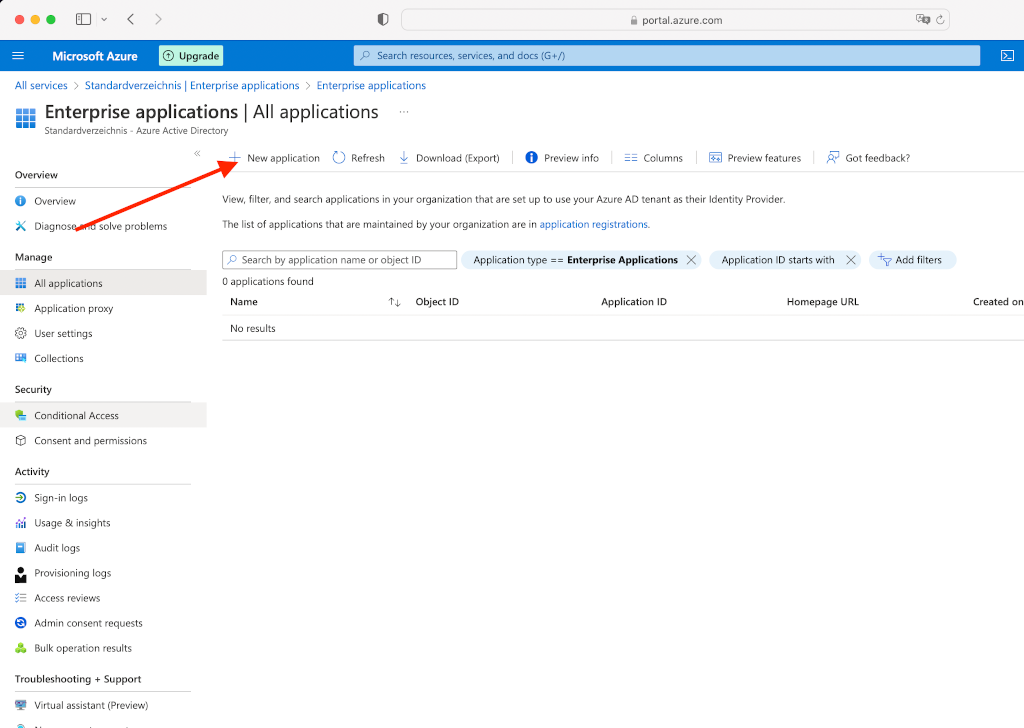
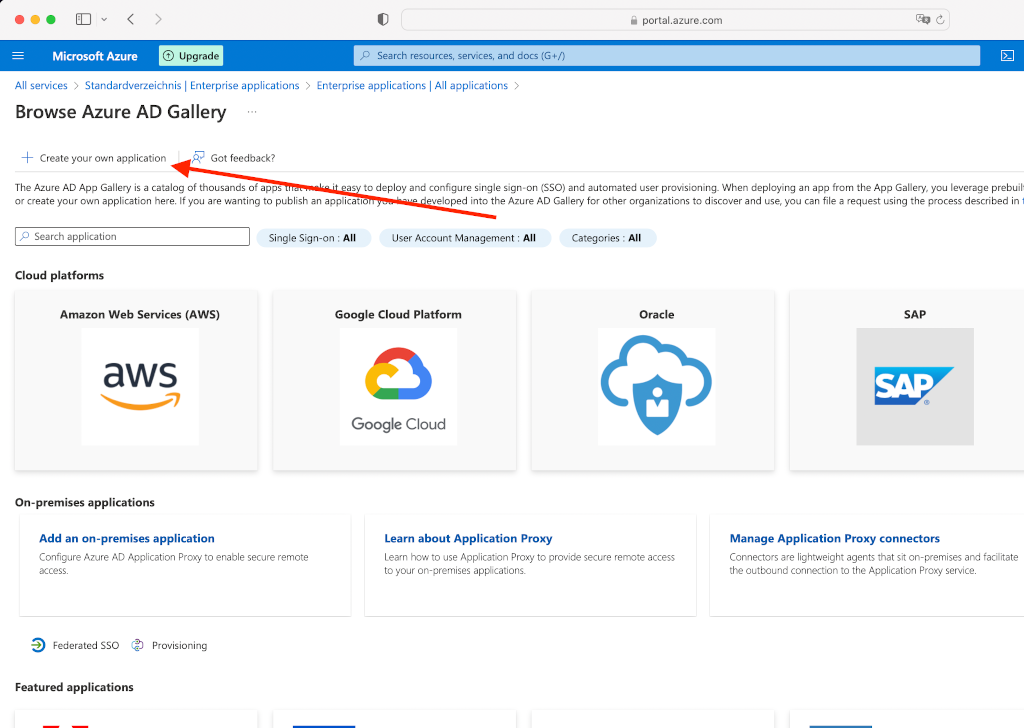
Create your own application
Assign a name to the application:
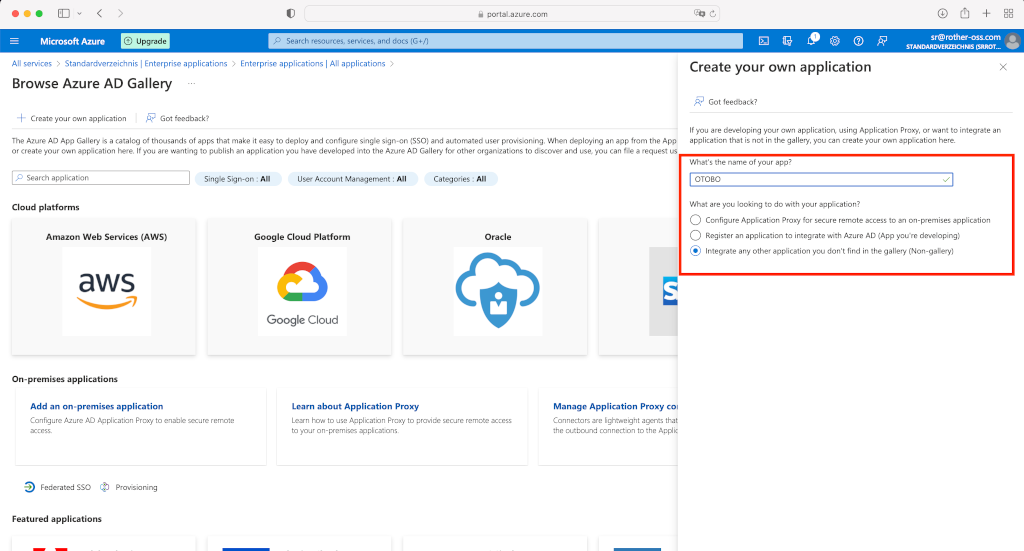
The mailbox user must be assigned to the application. You will need the Application ID lateron in OTOBO. Please note, the Application ID of the “Enterprise APP” may differ from that of the “Application Registration”. In this case, please use the Application/Client ID of the registration.
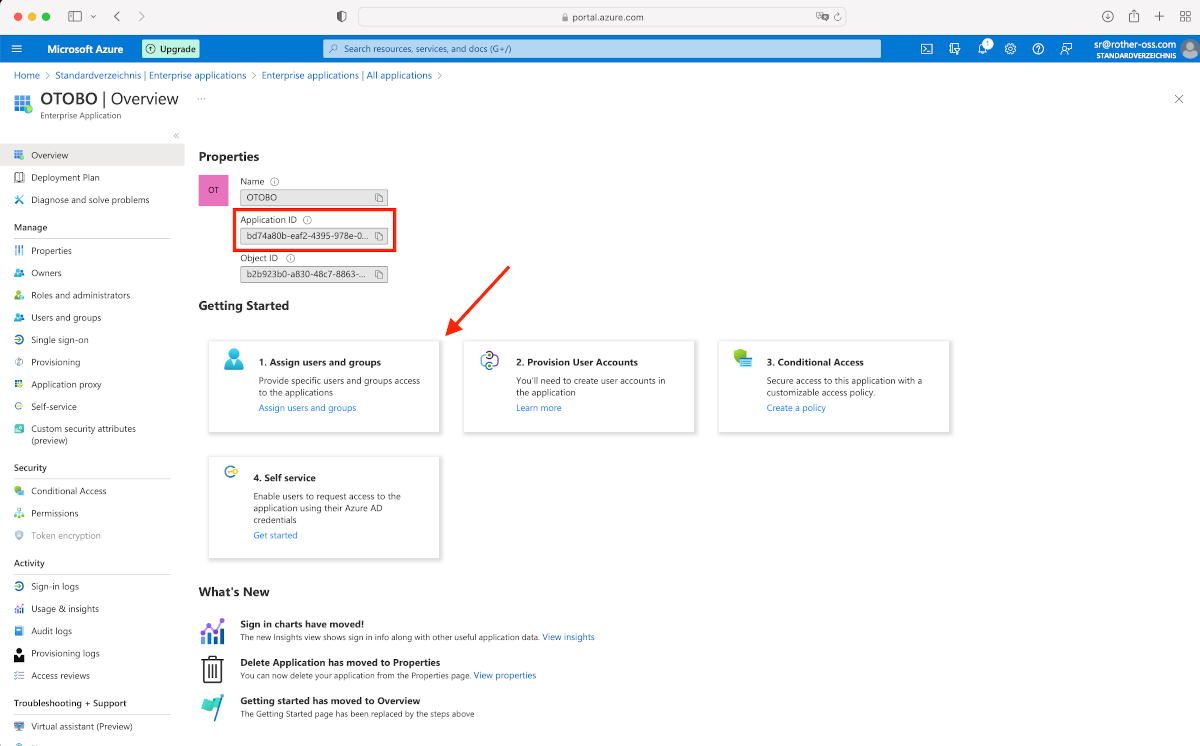
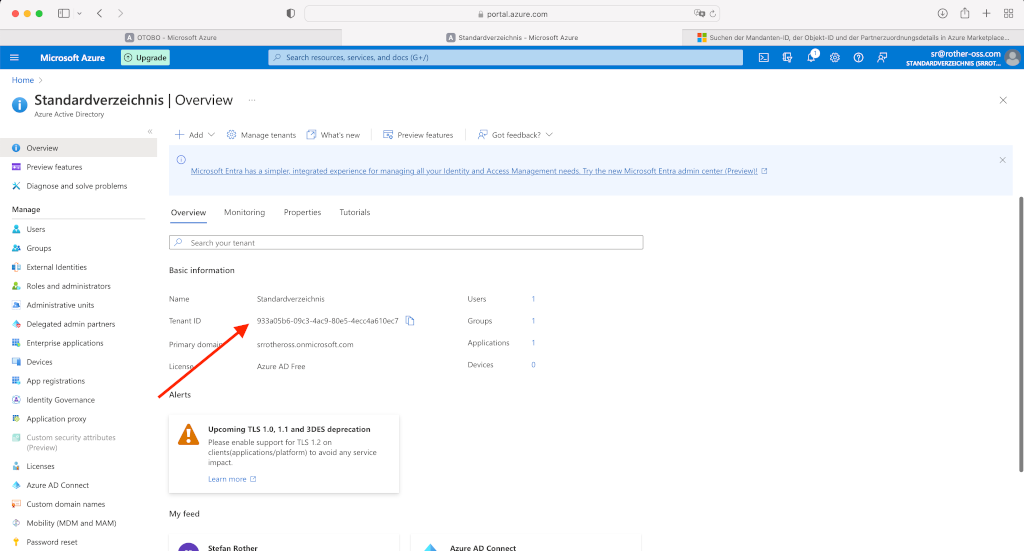
ou will also need the domain’s “Tenant ID”.
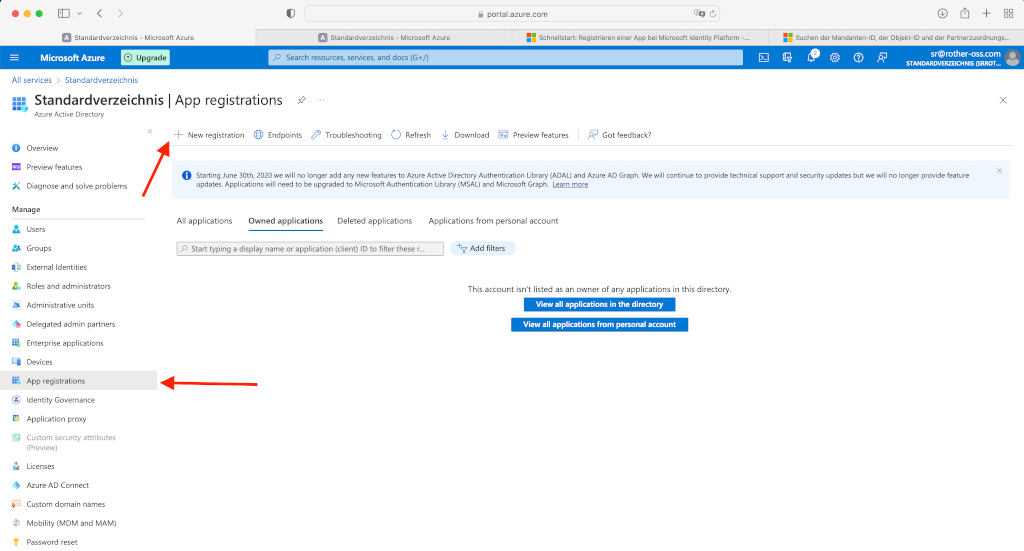
Add a new Application in “App registrations”:
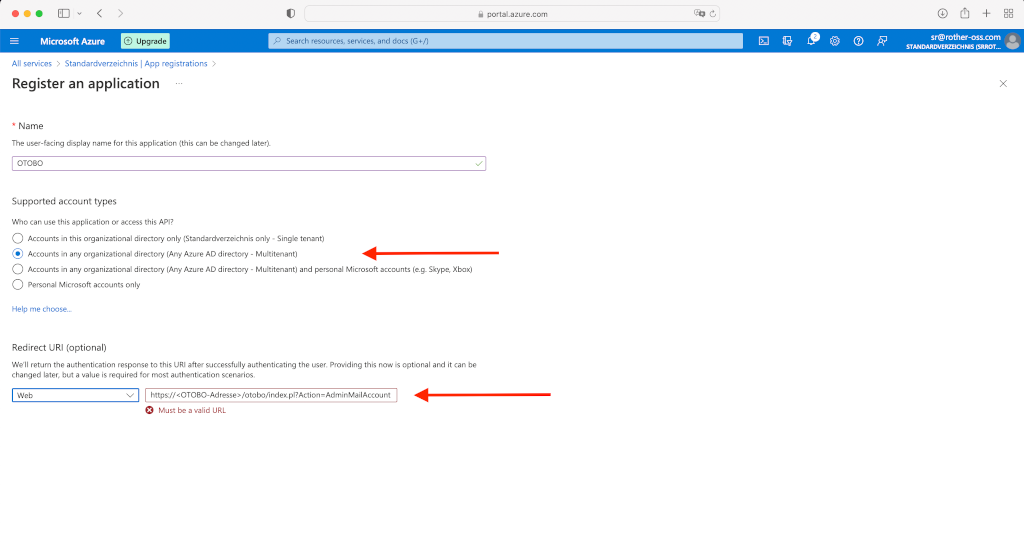
Create a Redirect URL of type “Web” and a secret client key.
The Redirect URL should look like: https://<OTOBO address>/otobo/index.pl?Action=AdminMailAccount
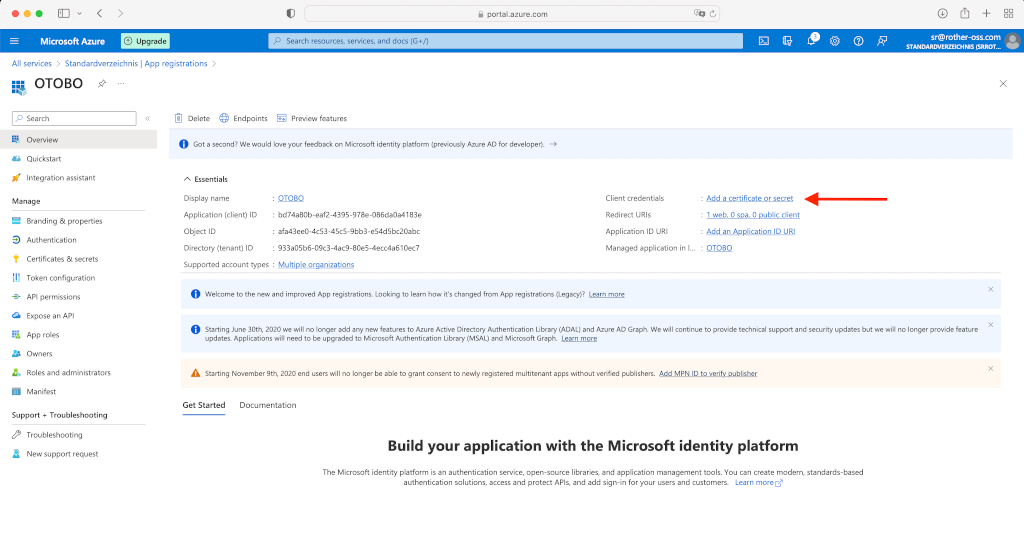
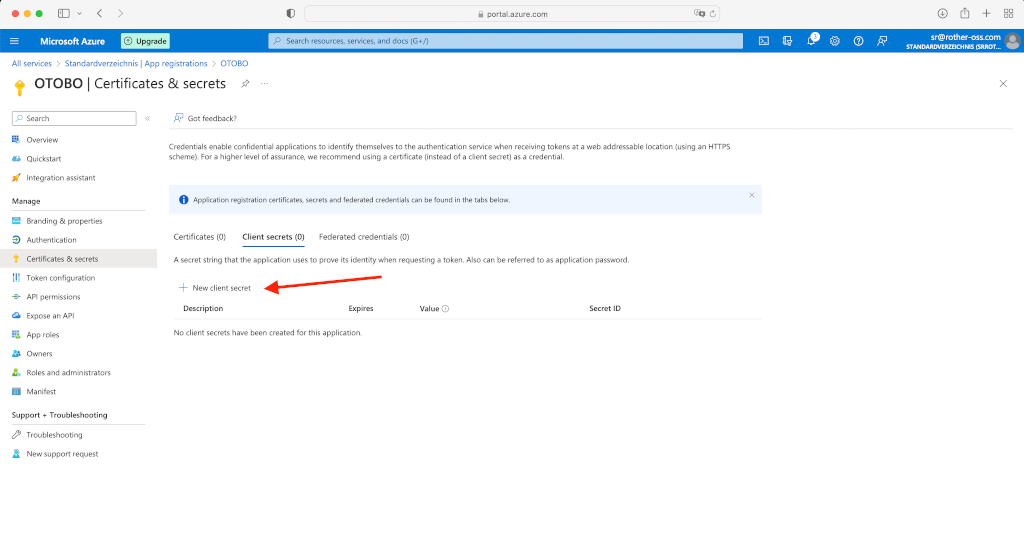
Please add a new client secret and note the value (not the “Secret ID”) as we need it later. It will only appear during the creation and you will not be able to see it afterwards anymore. Apparently, Microsoft only allows a time of validity for two years max.
Switch to API permissions and add IMAP.AccessAsUser.All and POP.AccessAsUser.All:
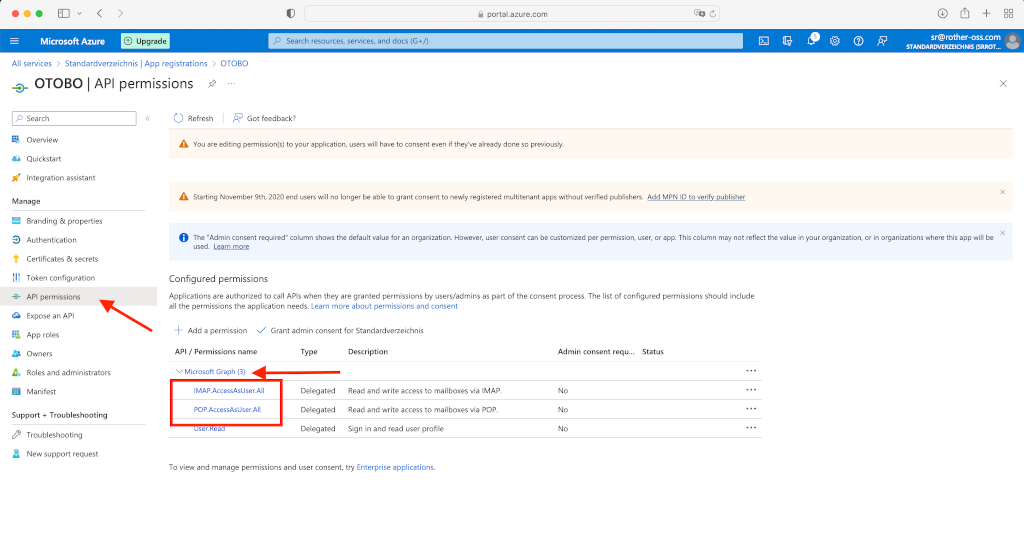
Please click on “Add permission” and choose Microsoft Graph, then new delegated permissions in the bar on the right, if Microsoft Graph does not show up like depicted in the screenshot.
The Azure configuration is now complete. Please check whether port 143 and 993 are enabled.