States
Active tracking of tickets leads to a better sense of workload and provides metrics as a key performance indicator. Sorting tasks and setting appointments can help to level-off the workload and keep your service desk running.
OTOBO uses ticket states to ensure that your agents always know which tickets are being attended to and which not. Additionally, detailed reports on the states of your tickets can be provided by ticket search or reports and personalized sorting is possible using dashboards and queue and service overviews.
Nine states are pre-defined. More states can be added, but the default states are enough to get you going and mostly enough for any situation.
The default states are the following:
- closed successful
A ticket is complete. The customer received a solution which worked.
- closed unsuccessful
A ticket is complete. The customer received no solution or the solution was not appropriate.
- merged
The ticket content is found in a different ticket.
- new
The ticket is created by the customer without contact with an agent.
- open
The ticket is currently in progress. Customer and agent are in contact with each another.
- pending auto close+
The ticket will be set as closed successful upon reaching the pending time.
- pending auto close-
The ticket will be set as closed unsuccessful upon reaching the pending time.
- pending reminder
The ticket should be worked on again upon reaching the pending time.
- removed
The ticket has been removed from the system.
Note
Pending jobs are checked per default every two hours and forty-five minutes. This time is a static time, which means the times are 02:45, 04:45, 06:45 and so on. The job can be run more often or seldom and is configured in the System Configuration module of the Administration group.
Use this screen to add states to the system. A fresh OTOBO installation contains several states by default. The state management screen is available in the States module of the Ticket Settings group.
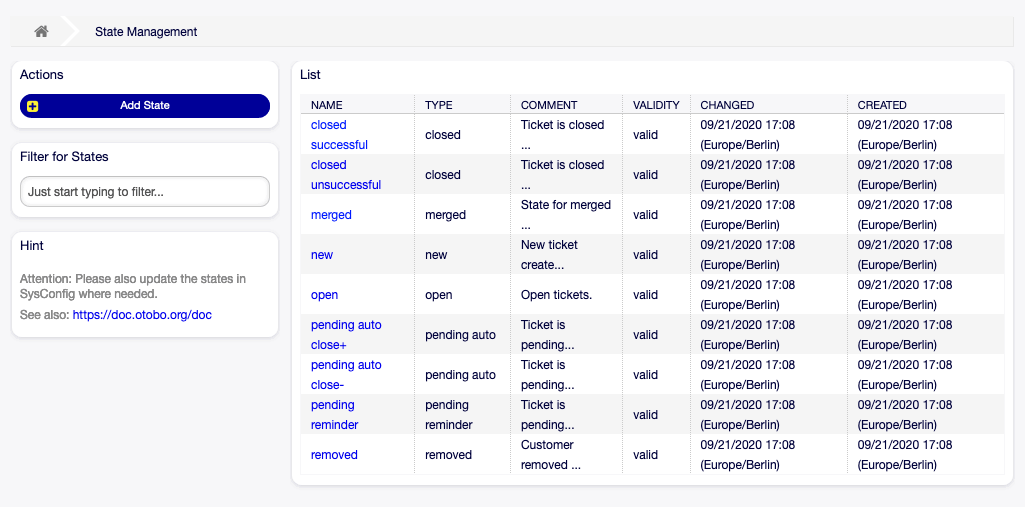
State Management Screen
Manage States
To add a state:
Click on the Add State button in the left sidebar.
Fill in the required fields.
Click on the Save button.
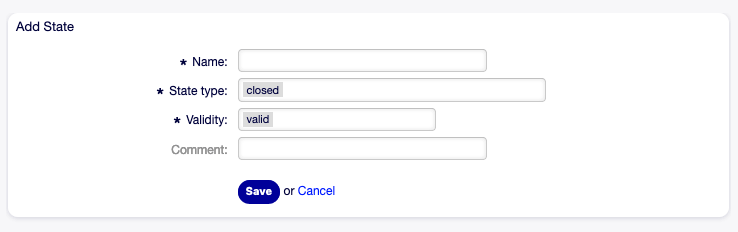
Add State Screen
Warning
States can not be deleted from the system. They can only be deactivated by setting the Validity option to invalid or invalid-temporarily.
To edit a state:
Click on a state in the list of states.
Modify the fields.
Click on the Save or Save and finish button.
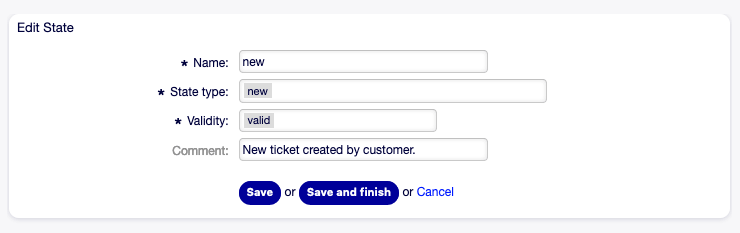
Edit State Screen
Note
If several states are added to the system, use the filter box to find a particular state by just typing the name to filter.
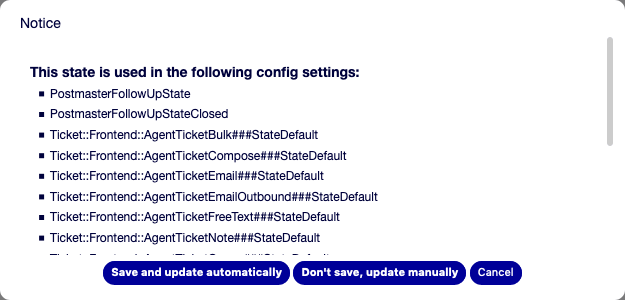
State Validation Dialog
If you change the name of a state which is used in the system configuration, a validation check will warn you and give you the following options:
- Save and update automatically
Apply the change and also update the affected settings.
- Don’t save, update manually
Apply the change, but don’t update the affected settings. The updates need to be done manually.
- Cancel
Cancel the action.
Warning
Changing the name of this object should be done with care, the check only provides verification for certain settings and ignores things where the name can’t be verified. Some examples are dashboard filters, action control lists (ACLs), and processes (sequence flow actions) to name a few. Documentation of your setup is key to surviving a name change.
State Settings
The following settings are available when adding or editing this resource. The fields marked with an asterisk are mandatory.
- Name *
The name of this resource. Any type of characters can be entered to this field including uppercase letters and spaces. The name will be displayed in the overview table.
- State type *
Every state is linked to a type, which needs to be specified if a new state is created or an existing one is edited. The following types are available:
closed
merged
new
open
pending auto
pending reminder
removed
Note
State types are predefined and cannot be changed in the software due to their special mechanics. When adding new states for pending auto and pending reminder state types you must make further configurations in the System Configuration module of the Administration group.
- Validity *
Set the validity of this resource. Each resource can be used in OTOBO only, if this field is set to valid. Setting this field to invalid or invalid-temporarily will disable the use of the resource.
- Comment
Add additional information to this resource. It is recommended to always fill this field as a description of the resource with a full sentence for better clarity, because the comment will be also displayed in the overview table.
State Configuration Options
The following options are relevant and noteworthy. Please review these when managing states:
Daemon::SchedulerCronTaskManager::Task###TicketPendingCheckTicket::StateAfterPending